Introduction to photo background removal services
When it comes to creative projects, one of the most important aspects is the background. The right background can make or break a project, and finding the perfect one can be a challenge. That's where photo background removal services come in.
A photo background removal service can help you take an ordinary photo and turn it into a masterpiece. Whether you're looking for a simple background change or something more complex, these services can help you get the perfect result.
There are a few things to keep in mind when choosing a photo background removal service. First, you'll want to consider the quality of the results. Make sure to read reviews and look at examples of the work before you choose a service.
Second, you'll want to consider the price. Background removal services can vary widely in price, so it's important to find one that fits your budget.
Finally, you'll want to consider the turnaround time. Some services can have your project completed in just a few hours, while others may take a few days. Make sure to ask about turnaround time before you choose a service.
Photo background removal services can be a great way to take your creative projects to the next level. With a little research, you can find a service that will give you the perfect background for your project.
How to remove background in Photoshop
Assuming you have a basic understanding of Photoshop and its layers panel, we will now go over how to remove the background of an image using the software. This can be useful for creating collages, memes, or simply improving the look of a photo.
1) Open the image in Photoshop.
2) Select the “Quick Selection Tool” from the left toolbar. It looks like a paintbrush with a plus sign.
3) Click and drag your mouse over the area of the image you wish to keep. The selection will automatically expand to include similar colors.
4) To remove a selection, hold down the Alt key and click inside the selection.
5) Once you are satisfied with your selection, go to Select > Inverse. This will inverse your selection so that everything outside of the selection is now selected.
6) Press the delete key to remove the background.
You can also use the “Pen Tool” to make a more precise selection. Simply trace around the edge of the object you wish to keep and Photoshop will automatically select the area for you.
Removing the background from an image can be a simple or complex task depending on the image itself. However, with a little practice, you should be able to remove most backgrounds with ease.
Photo background editor
A photo background editor is a great tool for anyone who wants to create professional-looking photos. By removing the background from a photo, you can create a more polished look that can really make your photos stand out.
There are a few different ways to remove the background from a photo. You can use a simple online tool like PicMonkey, or you can use a more advanced program like Adobe Photoshop.
If you want to remove the background from a photo without spending any money, PicMonkey is a great option. It’s a free online photo editor that has a “Background Eraser” tool that you can use to remove the background from a photo.
To use the Background Eraser tool, first upload the photo that you want to edit. Then, select the Background Eraser tool from the left-hand side menu.
Next, use your mouse to click and drag over the area of the photo that you want to remove. As you drag your mouse, the background will be removed. You can continue to click and drag until all of the background has been removed.
Once you’re happy with the results, you can download the edited photo or share it directly to social media.
If you’re willing to spend a little bit of money, Adobe Photoshop is a great option for removing backgrounds from photos. Photoshop is a more advanced photo editor, so it will take some time to learn how to use it. However, it’s worth it if you want to create professional-looking photos.
To remove the background from a photo in Photoshop, first open the photo in the program. Then, select the “Quick Selection Tool” from the toolbar on the left-hand side.
Next, click and drag your mouse over the area of the photo that you want to remove. As you drag your mouse, the background will be selected. You can continue to click and drag until all of the background has been selected.
Once the background has been selected, you can press the “delete” key on your keyboard to remove it. You can also click the “Edit” menu at the
Remove background from image
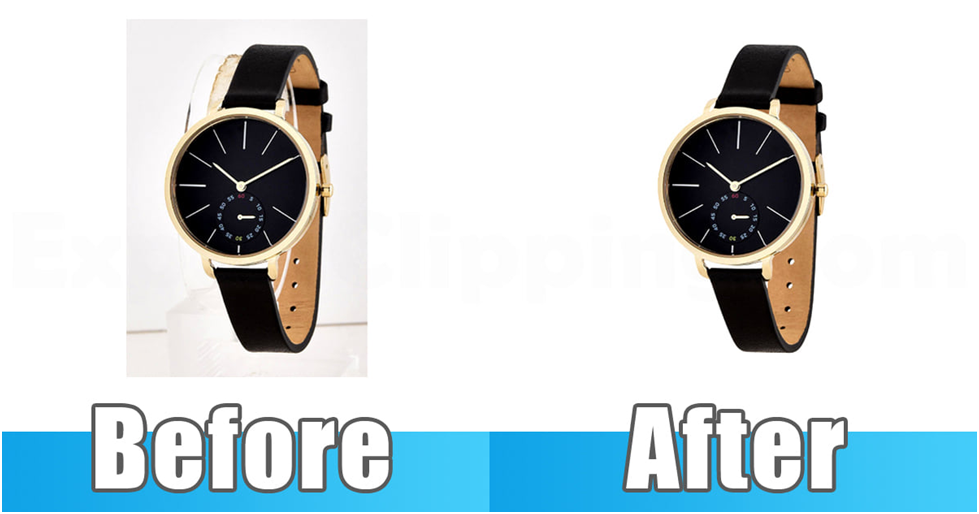
Background removal is one of the most popular image editing services. It is commonly used in e-commerce, product photography, and for creating marketing materials. The process of removing the background from an image can be complex and time-consuming, but with the right tools, it can be done relatively easily.
There are a few different ways to remove the background from an image. The most common method is to use an image editing software like Adobe Photoshop. Photoshop has a number of different tools that can be used to remove the background from an image.
Another common method is to use a clipping path. A clipping path is an outline of the subject of an image. It can be created using a vector graphic software like Adobe Illustrator. Once the clipping path is created, the background can be removed by placing the image on a solid color background.
There are a number of online services that offer background removal services. These services can be very helpful for those who do not have the time or the expertise to remove the background from an image themselves.
When choosing a background removal service, it is important to choose one that has a good reputation and that offers a money-back guarantee. This will ensure that you are satisfied with the results.
Photoshop background
If you're anything like me, you love finding new and creative ways to use Photoshop. Whether you're a beginner or a pro, there's always something new to learn. Today, I want to share 5 fun and creative ways to use Photoshop backgrounds.
- Remove Backgrounds with the Pen Tool
One of my favorite ways to remove backgrounds in Photoshop is with the pen tool. It's a great way to get clean, precise lines and it's perfect for removing complex backgrounds.
To remove a background with the pen tool, first, create a new layer. Then, select the pen tool from the toolbar and begin tracing around the object you want to remove. Once you've made your selection, right-click and select "Layer via Cut." This will remove the background and leave you with a clean, isolated object.
- Use Layer Masks to Remove Backgrounds
Layer masks are another great way to remove backgrounds in Photoshop. They're perfect for removing simple backgrounds and they're non-destructive, meaning you can always go back and make changes if you need to.
To remove a background with a layer mask, first, create a new layer. Then, select the object you want to remove and click the "Add Layer Mask" button at the bottom of the layers panel. A layer mask will be added to your selection. Next, use a black brush to paint over the background. As you paint, the background will be removed, revealing the layer beneath.
Photo retouching service for graphic designers
Professional background removal service for product photography
Professional background removal service for graphic designers
High-quality background removal service for online retailers
Custom background removal service for creative projects
- Use the Eraser Tool
The eraser tool is a quick and easy way to remove backgrounds in Photoshop. It's perfect for simple backgrounds and it's destructive, meaning you can't go back and make changes once you've erased something.
To remove a background with the eraser tool, first, create a new layer. Then, select the object you want to remove and click the "Eraser" tool from the toolbar. Next, use a soft-edged brush to erase the background. As you erase, the background will be removed, revealing the layer beneath.
- Use the Clone Stamp Tool
The clone stamp tool is a great way to remove complex
Background editor
As a creative professional, you know that a great image can make or break your project. That's why you need the best background removal service to make sure your images are perfect.
Enter Background Editor.
Background Editor is the leading provider of background removal services for creative professionals. We have a team of highly skilled editors who can quickly and easily remove any unwanted background from your images.
Whether you need to remove a background for a print project or for a digital project, we can help. We can even remove complex backgrounds, like those with multiple colors or patterns.
Plus, we offer a 100% satisfaction guarantee on all of our services. So if you're not happy with the results, we'll make it right.
If you need a background removal service that will give you perfect results every time, look no further than Background Editor. Contact us today to learn more about our services or to get started on your project.
Background white
When it comes to backgrounds, white is often seen as the default option. But there are times when a white background just won’t cut it. Maybe you’re looking for something a little more creative or maybe you need a background that will better complement your product. Whatever the case may be, you don’t have to settle for a white background.
There are a number of ways to change up your background without going for the traditional white. Here are 7 background options that are sure to make your project stand out:
- Blue
Blue is a great alternative to white. It has a calming effect and can be very soothing. If you’re looking for a background that will help your product stand out, blue is a great option.
- Green
Green is another great option for a background color. It’s associated with nature and can help give your project a fresh, earthy feel.
- Yellow
Yellow is a happy color that can help add some extra excitement to your project. It’s perfect for products that are fun and upbeat.
- Orange
Orange is a great color for adding some extra energy to your project. It’s perfect for products that are high-quality and vibrant.
- Red
Red is a powerful color that can help your product make a strong impression. It’s perfect for products that are luxury items or that are meant to be seen as high-end.
- Pink
Pink is a playful color that can help add a touch of fun to your project. It’s perfect for products that are geared towards children or that are meant to be lighthearted and fun.
7.Purple
Purple is a regal color that can help give your product a luxurious feel. It’s perfect for products that are high-end and that need to make a strong impression.
- Transparent image
A transparent image is an image that has been edited so that one or more of its colors have been replaced with a corresponding color from a different image. The process of creating a transparent image is known as color keying.
There are a number of reasons why you might want to create a transparent image. For example, you might want to create a logo that can be placed on top of a background image, or you might want to create a composite image that combines multiple images into one.
There are a few different ways to create a transparent image. The most common way is to use an image editing program like Adobe Photoshop or GIMP.
In Photoshop, you can create a transparent image by creating a new layer and then painting on that layer with a color that you want to be transparent. When you're finished, you can save the image as a PNG file, which supports transparency.
In GIMP, you can create a transparent image by using the "Color to Alpha" tool. First, open the image that you want to make transparent. Then, select the "Color to Alpha" tool from the toolbox.
Click on the color that you want to make transparent. All pixels of that color will become transparent. You can then save the image as a PNG file.
There are a few things to keep in mind when creating a transparent image. First, try to use a solid color for the background. This will make it easier to remove the background color later.
Second, make sure that the edges of the object that you're trying to make transparent are well-defined. If the edges are blurry, it will be difficult to remove the background color.
Third, remember that transparency is relative. That is, a pixel is only considered transparent if there is a pixel of a different color behind it. This means that if you make a pixel transparent, any pixels that were behind it will now be visible.
Finally, keep in mind that transparency is an all-or-nothing proposition. You can't make only part of a pixel transparent. If you want to make only part of an image transparent, you'll need to create a separate image that
Facebook: https://www.facebook.com/expertclipping
G+: https://plus.google.com/u/0/+expertclipping-ec
Twitter: https://twitter.com/expertclipping
Yelp: https://www.yelp.com/biz/expert-clipping-barking
Youtube: https://www.youtube.com/c/Expertclipping-ec
Contact: Contact us | Clipping Path Quality Service | Expert Clipping
Free quote: Photo Editing Services Free Quote With Expert Clipping
Pricing & Payments: Affordable Photo Editing Service Prices | 100% guarantee
Google Maps: https://goo.gl/maps/tj5FRP3vVMbW1uzM9
Office address:
Bangladesh office:
House # 02 Section # 01 Road # 01 Mirpur-1 Dhaka-1216, Bangladesh.
E-mail: [email protected]
Phone: +880 1711011258
UK OFFICE
24 Longbridge Road
Barking Essex IG118tnv
Phone: 02036093822
ITALY OFFICE
168 Belaws, 4th Floor
Via Tolpada 21, 11400